1 Introduction
Progress reports are created and submitted by external users with the appropriate privileges for every budget period of an award, with the exception of the last budget period. These reports are intended to show the Program Manager(s) (PMs) the current status of the award and describe how the funds provided have been used to further scientific research and studies.
The purpose of this document is to provide step-by-step instructions for users to follow to complete the Progress Report task.
2 Prerequisites
Before a Progress Report can be submitted, the following criteria must be met:
- A Progress Report task has been created.
- PAMS has sent an email to the PI requesting completion of a progress report.
- The external user (PI and SRO/BO/AO) has the edit and/or submit privilege for an active award.
3 Completing a Progress Report
Use the following steps to complete and submit a progress report.
3.1 Accessing the Progress Report Task
Use the following steps to access the progress report task.
3.1.1 Existing Account
Use the following steps to access the Progress Report task if the PI on the award has an existing external PAMS account.
1. PAMS will send an email notification to the PI indicating that the task has been created. Follow the Portfolio Analysis and Management System (PAMS) link provided in the email. OR Log in to the PAMS external website at http://pamspublic.science.energy.gov.
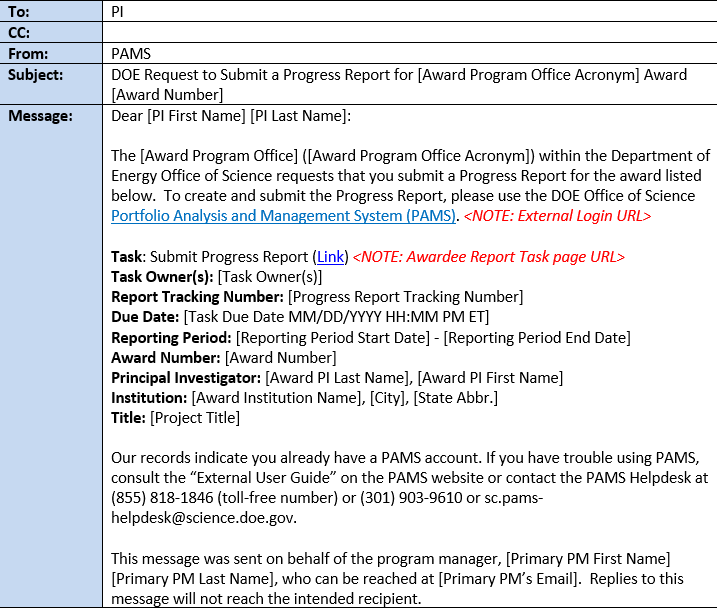
Figure 1. PAMS Email Notifications – Existing PI, Progress Report Task
| For guidance on logging in, refer to Logging In. |
2. Once you are logged in to PAMS, navigate to the Tasks tab > Pending Tasks – List page.

Figure 2. Tasks – Pending Tasks – List Page, Start Progress Report
3. Find the Submit Progress Report task you want to complete, and click the Start Progress Report link in the Options column. If necessary, use the filters in the grid or click the Search link on the right above the grid to find a specific Submit Progress Report task to work on.
3.1.2 No Existing Account
Use the following steps to access the Progress Report task if the PI on the award does not have an existing external PAMS account.
1. If the PI does not have an existing external PAMS account, PAMS will send an email notification to the PI indicating that the task has been created, and provide a registration link and code. Click the I do not have a PAMS account link.

Figure 3. PAMS Email Notifications – No Existing PI, Progress Report Task
2. The user will be navigated to the PAMS login page. For guidance on creating a PAMS account with a registration code, refer to Create/Update a User Account.
3.2 Reviewing Progress Report Status
When you select a progress report on the Pending Tasks – List page, PAMS redirects you to the progress report’s Progress Report – Status page. The Progress Report – Status page shows the completion status of each section of the progress report. The sections are listed in the left navigation menu and in the Progress Report Status section on the page.
Sections that are complete will display “Complete” with a green checkmark in the Status column. Sections that are not complete will display “Not Started” or “In Progress” with a green checkmark with a red slash through it in the Status column.

Figure 4. Progress Report – Status Page
|
|
3.3 Completing the Cover Page
The Cover Page always has a status of “Complete”, because the information in this section prepopulates with information from the Award record. Use the following steps to review and edit the Cover page.
1. Navigate to the Cover Page by clicking Cover Page in the left navigation menu or by clicking Update in the Options column on the Progress Report – Status page.
2. PAMS will load the Progress Report – Cover Page. On this page, you can add, edit, or delete the Recipient Award Identification Number.
| The Recipient Award Identification Number is a number issued by the recipient and used for internal processing or reporting. |

Figure 5. Progress Report – Cover Page
| Because the Award and PI Information prepopulate from the Award record, you cannot edit them on the Cover Page. To edit this information, you must create an Award Modification Request. (For guidance on creating an Award Modification Request, refer to How To: Create Award Modification Request.) |
3. Once you have completed the Cover Page section, click Mark as Complete in the bottom right corner of the page.
| For any page with a Choose Action dropdown:
Click Go to Previous Section in the bottom left corner of the page to return to the previous section without saving your progress. |
4. PAMS will redirect you to the next section and display a Success message confirming that the Cover Page was marked as complete successfully.

Figure 6. Cover Page Success Message
3.4 Completing the Accomplishments Section
The Accomplishments section of the progress report records the project’s performance over the duration of the award. This performance is tracked with a list of six questions pertaining to project goals, accomplishments, training and development opportunities, dissemination of results, and goals and intentions for the next reporting period. Use the following steps to complete the Accomplishments section of the progress report.
1. Fill in each textbox as appropriate. If applicable, you can select the “Nothing to Report” or “No Change” radio buttons and leave the accompanying textbox empty.

Figure 7. Progress Report – Accomplishments
|
|
2. Once you have completed the required fields, select Mark as Complete from the Choose Action dropdown and click Go.
3. PAMS will load a Success message confirming that the Accomplishments section has been marked as complete successfully.

Figure 8. Progress Report – Accomplishments Success Message
3.5 Completing the Products Section
The Products section of the progress report inventories all products created during the course of the project. There are twelve Product types:
- Publication – Journal Article
- Publication – Book
- Publication – Book Chapter
- Publication – Thesis/Dissertation
- Publication – Conference Paper/Presentation
- Publication – Website
- Publication – Other Publication
- Intellectual Property – Patent
- Intellectual Property – Invention
- Intellectual Property – License
- Technologies or Techniques
- Other Products

Figure 9. Progress Report – Products
| For Labs Awards, PAMS will display an "Additional Products (Response for DOE)" section below the "Other Products" section. |
3.5.1 Adding Products for Non-Lab Awards
1. To add or update Products for non-Lab Awards, click the Add/Update Products link above the Publications section on the Progress Report – Products page. PAMS will navigate to the Products – Add/Update Products page, which displays a list of Products associated with the Award.

Figure 10. Products – Add/Update Products
|
|
2. To add a new Product, click Add/Update Product in E-Link.
3. PAMS will display a Confirmation overlay stating that the user will be redirected to E-Link. Click Confirm.

Figure 11. Products – Add/Update Products, Navigate to E-Link Confirmation
4. PAMS will navigate to E-link. Add/update Products in E-Link as necessary. For E-Link specific guidance, you may visit:
5. When you are finished, click the "Return to PAMS" button. E-Link will return you to the Products – Add/Update Products page, where PAMS will display a Note detailing the last Product data sync.

Figure 12. Products – Add/Update Products, Sync
3.5.2 Adding Products to the Report
1. Review the list of Products on the Products – Add/Update Products page to ensure the correct Products are selected for inclusion on the progress report. When you are ready, click Save and Continue in the bottom right corner. PAMS will return to the Progress Report – Products page and display a green success message confirming that the Products list has been updated successfully.
| You can remove Products on the Progress Report – Products page by selecting the Remove from Report action in the Action menu for the Product. |
3.5.3 Adding Products for Lab Awards
1. To add or update Products for Lab Awards, click the Add Products to Report link above the Publications section on the Progress Report – Products page.

Figure 13. Progress Report – Products, Add Products to Report
2. PAMS will navigate to the Products - Select Award Products page, which displays a list of Products available to associate with the awardee report. To add Products from OSTI.gov, click the Add Products to Award from OSTI.gov link below the Resources header.

Figure 14. Products - Select Award Products
| If a Product was approved on a previously submitted Lab Awardee Report and was prepopulated on the current Awardee Report, the checkbox for that Product will be selected by default and you will not be able to deselect it. |
3. PAMS will navigate to the Products – Add Products from OSTI.gov page. This page allows you to search for and select STI Products from OSTI.gov to associate to your Lab Award. Selected Products will be linked to your Award record for tracking and reporting purposes. To locate a Product, enter at least one search parameter in the basic or advanced search parameters and click the Search button.

Figure 15. Products – Add Products from OSTI.gov
4. PAMS will reload the page with search results from OSTI. Once you have found the Product you would like to associate to your Award, select the checkbox associated to that Product and click Save and Continue in the bottom right corner.

Figure 16. Products – Add Products from OSTI.gov, Save and Continue
5. PAMS will return to the Products – Select Award Products page and display a green success message confirming that the Products list of the report was updated successfully.

Figure 17. Products – Select Award Products, Success
6. When you are finished selecting Products to add to the Award, click Save and Continue in the bottom right corner.
7. PAMS will return to the Progress Report – Products page and display a green success message confirming that the Products list of the report was updated successfully.

Figure 18. Progress Report – Products, Success
3.5.4 Marking the Products Section as Complete
Use the following steps to mark the Products section of the progress report as complete.
1. Once you have completed the Products section, click Mark as Complete in the bottom right corner of the page.
2. PAMS will redirect you to the next section and display a Success message confirming that the Products page was marked as complete successfully.

Figure 19. Progress Report – Products – Success Message
3.6 Completing the Participants Section
The Participants section of the progress report lists all individuals and entities involved with the project. There are three Participants categories: Participants, Partners, and Other Collaborators. Use the following steps to complete the Participants section of the progress report.
1. Navigate to the Participants section by clicking Participants in the left navigation menu, Update in the Options column on the Progress Report – Status page, or Save and Continue on the Progress Report – Products page.
2. PAMS will load the Progress Report – Participants page. Refer to the following sections for steps on how to add each applicable Participant type.

Figure 20. Progress Report – Participants
| Any participants added to previous progress reports for this award will display on this page. You do not need to add them again. For guidance on editing existing participants, refer to section 3.6.4 Editing Existing Participants. |
3.6.1 Adding a New Participant
Participants are any people who are principal investigator(s), project director(s), or have worked at least one month (approximately 160 hours) per year on this project during the reporting period, regardless of the source of their compensation. Use the following steps to add a new participant to the progress report.
1. Click the Add New Participant link under the Participants header on the Progress Report – Participants page.
2. PAMS will load the Progress Report – Add New Participant – List page. Use the Last Name like, First Name Like, and Email like fields to search for the registered PAMS user(s) you would like to add to the progress report. Click Search to see the list of results.

Figure 21. Progress Report – Add New Participant – List
3. Browse the list. When you have found the user you would like to add, click Add Participant in the Options column.

Figure 22. Progress Report – Add New Participant – List, Add Participant
|
|
4. PAMS will load the Progress Report – Add New Participant page. Refer to the table below to complete the required fields to add a new participant to the progress report.
Required Fields
Element | Description |
First Name | The first name of the person you are reporting as a participant will already be entered. You will not be able to edit this field. |
Last Name | The last name of the person you are reporting as a participant will already be entered. You will not be able to edit this field. |
Project Role | Use the dropdown to select the role the participant filled on the project. If Other, specify the project role in the box to the right of the dropdown. |
Person Months Worked | Enter the number of months the person worked on the project. Round the number to the nearest whole number. |
Contribution to the Project | Enter a description of the person’s contribution to the project. |
International Collaboration? | Select the “Yes” or “No” radio button to indicate whether the participant collaborated with any individuals in a foreign country as a part of this project during the reporting period. |
International Travel? | Select the “Yes” or “No” radio button to indicate whether the participant travelled to a foreign country as a part of this project during the reporting period. |

Figure 23. Progress Report – Add New Participant
5. Once you have completed the page, select Mark as Complete from the Choose Action dropdown and click Go to save your work and return to the Progress Report – Participants page.

Figure 24. Progress Report – Add New Participant – Choose Action
3.6.2 Adding a New Partner
Partner organizations are any institutions (academic, nonprofit, commercial, or governmental) that have been involved with the project. Involvement will usually consist of financial support, providing facilities, personnel exchange, in-kind support, or research collaboration. Other activities that indicate a similar level of involvement should also be reported. Both foreign and domestic organizations must be reported. Use the following steps to add a New Partner to the progress report.
1. Click the Add New Partner link under the Partners header on the Progress Report – Participants page.
2. PAMS will load the Progress Report – Add New Partner page. Refer to the table below to complete the required fields to add a new partner to the progress report.

Figure 25. Progress Report – Add New Partner
Required Fields
Element | Description |
Partner Organization Name | Enter the name of the organization participating as a partner on this project. |
Country | Click the dropdown and select the country in which the organization is located. |
City | Enter the city in which the organization is located. |
Partner Contribution | Check the boxes to indicate the type of contribution the organization made to the project. |
Description of the Contribution | Enter a description of the contribution the organization made to the project. |
3. Once you have completed the page, click Save and Continue to save your work and return to the Progress Report – Participants page.
3.6.3 Adding Other Collaborators
Other collaborators or contacts are any people or institutions who have made significant contributions to the project but do not meet the definition of Participant or Partner organizations. Consultants and mentors would fit into this category, though many projects will not have any other collaborators or contacts. Use the following steps to add Other Collaborators to the progress report.
1. Click the Add Other Collaborator link under the Other Collaborators header on the Progress Report – Participants page.
2. PAMS will load the Progress Report – Add Other Collaborator page. Refer to the table below to complete the required fields to add an Other Collaborator to the progress report.

Figure 26. Progress Report – Add Other Collaborator
Required Fields
Element | Description |
Description of the Contribution | Enter a description of the contribution. |
3. Once you have completed the page, click Save and Continue to save your work and return to the Progress Report – Participants page.
3.6.4 Editing Existing Participants
Use the following steps to make any changes to a participant in the Participants section.
3.6.4.1 Updating an Existing Participant
1. Navigate to the Progress Report – Participants page by clicking Participants in the left navigation menu, Update in the Options column on the Progress Report – Status page, or Mark as Complete on the Progress Report – Products page.
2. Click Update in the Actions/Views dropdown for the participant you would like to update. PAMS will redirect you to the participant’s page (refer to the Participant pages above).
3. Click Save and Continue in the bottom right corner to save any changes when you are finished, or click Cancel in the bottom left corner to cancel any changes.
| You can view a participant at any time before submitting the progress report by clicking the Actions/Views dropdown on the Progress Report – Participants page and selecting View. The participant will load in a popup window on top of the main window. Click the Close Window button in the bottom right corner when you are finished. |
3.6.4.2 Deleting an Existing Participant
1. Navigate to the Progress Report – Participants page by clicking Participants in the left navigation menu, Update in the Options column on the Progress Report – Status page, or Mark as Complete on the Progress Report – Products page.
2. Click Delete in the Action/Views dropdown for the participant you would like to delete.
3. PAMS will display a Confirmation message asking if you are sure you want to delete the participant. Read the message carefully. If you are sure you want to delete the participant, click Confirm. If you do not want to delete the participant, click Cancel.

Figure 27. Progress Report – Participant – Delete Participant Confirmation Message
4. PAMS will load a Success message confirming that the participant was deleted successfully.

Figure 28. Progress Report – Participant – Delete Participant Success Message
3.6.5 Marking the Participants Section as Complete
Use the following steps to mark the Participants section of the progress report as complete.
1. Once you have completed the Participants section, click Mark as Complete in the bottom right corner of the page.
2. PAMS will redirect you to the next section and display a Success message confirming that the Products page was marked as complete successfully.

Figure 29. Progress Report – Participant Success Message
3.7 Completing the Impact Section
The Impact section of the progress report enables you to describe the impact of the project and to report spending in foreign countries. Impact is tracked with a list of seven questions pertaining to the development of the project’s principal disciplines, other disciplines, human resources, resources that form infrastructure, technology transfer, and society as a whole. Use the following steps to complete the Impact section of the progress report.
1. Navigate to the Impact section by clicking Impact in the left navigation menu, Update in the Options column on the Progress Report – Status page, or Mark as Complete on the Progress Report – Participants page.
2. PAMS will load the Progress Report – Impact page. Fill in each textbox as appropriate.
| Textboxes that are left blank are marked as “Nothing to Report”. |

Figure 30. Progress Report – Impact
3.7.1 Adding New Foreign Spending
If this project required foreign spending, you will need to report it in the progress report. Use the following steps to complete the Foreign Spending section on the Impact page.
1. Click Add New Foreign Spending above the Foreign Spending header on the Progress Report – Impact page.

Figure 31. Progress Report – Impact – Foreign Spending
2. PAMS will add an empty row to the Foreign Spending section. Click the Country dropdown to select the country in which the funds were spent.
3. Enter the dollar amount of the award’s funds spent in the foreign country.

Figure 32. Progress Report – Impact – Foreign Spending, Information
| You can delete the Foreign Spending entry at any point before submission by clicking the red X in the Options column next to the entry. |
3.7.2 Marking the Impact Section as Complete
Use the following steps to mark the Impact section of the progress report as complete.
1. Once you have completed the Impact section, select Mark as Complete from the Choose Action dropdown and click Go.

Figure 33. Progress Report – Impact – Choose Action
2. PAMS will redirect you to the next section and display a Success message confirming that the Products page was marked as complete successfully.

Figure 34. Progress Report – Impact – Success Message
3.8 Completing the Changes-Problems Section
The Changes-Problems section of the progress report enables you to describe any changes and/or problems with your project. This is tracked with a list of six questions pertaining to changes in the project’s approach, actual or anticipated problems, potential expenditure changes, changes in the use or care of live subjects or biohazardous material, change in project site location, and budget carryover amount. Use the following steps to complete the Changes-Problems section of the progress report.
1. Navigate to the Changes-Problems section by clicking Changes-Problems in the left navigation menu, Update in the Options column on the Progress Report – Status page, or by selecting Mark as Complete on the Progress Reports – Impact page.
2. PAMS will load the Progress Report – Changes-Problems page. Fill in each textbox as appropriate.
|
|

Figure 35. Progress Report – Changes-Problems
| For Lab Awards, the field under section "6. Carryover Amount" will read as follows: "Projected uncosted project balance for current scope of work at reporting period end." |
3. Once you have completed the Changes-Impact section, select Mark as Complete from the Choose Action dropdown in the bottom right corner of the page and click Go.

Figure 36. Progress Report – Changes-Problems – Choose Action
4. PAMS will redirect you to the next section and display a Success message confirming that the Changes-Problems page was marked as complete successfully.

Figure 37. Progress Report – Changes-Problems Success Message
3.9 Completing the Participant Information for Significant Contributors Section
This page displays the significant contributors entered in the Participants section of the Progress Report – Participants page. To complete this page, email addresses must be provided for all contributors. Use the following steps to complete the Participant Information for Significant Contributors section of the progress report.
1. Navigate to the Participant Information for Significant Contributors section by clicking Participant Information in the left navigation menu, Update in the Options column on the Progress Report – Status page, or by selecting Mark as Complete on the Progress Reports – Changes-Problems page.
2. PAMS will load the Progress Report – Participant Information for Significant Contributors page. Ensure that each user has an email address listed. If an email address is missing, click Update in the Actions/Views dropdown in the Options column.
|
|

Figure 38. Progress Report – Participant Information for Significant Contributors
3. PAMS will load the Progress Report – Update Participant Information for Significant Contributors page. Enter the user’s email address.

Figure 39. Progress Report – Update Participant Information for Significant Contributors
4. When you are finished, click Save and Continue in the bottom right corner of the page to save your changes, or click Cancel in the bottom left corner to return to the Progress Report – Participant Information for Significant Contributors page without saving any changes.
5. PAMS will display a Success message confirming that the information was saved successfully.

Figure 40. Progress Report – Update Participant Information for Significant Contributors Success Message
6. Once you have completed the Participant Information for Significant Contributors section, click Mark as Complete in the bottom right corner of the page.
7. PAMS will redirect you to the next section and display a Success message confirming that the Participant Information for Significant Contributors page was marked as complete successfully.

Figure 41. Progress Report – Participant Information for Significant Other Success Message
3.10 Completing the Attachments Section
The Attachments section of the progress report is reserved for Special Reporting Requirements. If the Reporting Requirements Checklist attached to your award does not require the use of attachments, do not use this section of the progress report. If your award does contain Special Reporting Requirements, use the steps below to submit the proper attachments.
1. Navigate to the Attachments section by clicking Attachments in the left navigation menu, Update in the Options column on the Progress Report – Status page, or Mark as Complete on the Progress Reports – Participant Information for Significant Contributors page.
2. PAMS will load the Progress Report – Attachments page. To add attachments, click Attach File in the Special Reporting Requirements header.

Figure 42. Progress Report – Attachments
| For Lab Awards, the Note will read as follows: "Progress Reports may only contain attachments if required by DOE. Attachments that are not required will not be disregarded." |
3. Click Browse, and select the files you would like to attach to the progress report.
|
|
4. Once you have selected the files you would like to attach, click Upload.
| To edit the Attachment Description or delete the attachment, click the Actions dropdown in the Options column and select the appropriate action. |
5. Once you have completed the Progress Report – Attachments page, or if you are skipping this page, click Mark as Complete in the bottom right corner of the page.
6. PAMS will redirect you to the next section and display a Success message confirming that the Progress Report – Attachments page was marked as complete successfully.

Figure 43. Progress Report – Attachments Success Message
3.10.1 Editing an Attachment
Use the following steps to edit an attachment in the Special Reporting Requirements section on the Progress Report – Attachments page.
1. Select Update Description in the Actions menu in the Options column.

Figure 44. Progress Report – Attachments – Update Description
2. Click Save when you are finished to save any changes, or click Cancel to cancel any changes.

Figure 45. Progress Report – Attachments – Update Description Save/Cancel
3.10.2 Deleting an Attachment
Use the following steps to delete an attachment in the Special Reporting Requirements section on the Progress Report – Attachments page.
1. Select Delete in the Actions menu in the Options column.

Figure 46. Progress Report – Attachments – Delete
2. PAMS will display a Confirmation message asking if you are sure you want to delete the attachment. If you are sure you want to delete the attachment, click Confirm. If you do not want to delete the attachment, click Cancel. PAMS will reload the Progress Report – Attachments page, and the attachment will no longer display in the Special Reporting Requirements section.

Figure 47. Progress Report – Attachments – Delete Attachment Confirmation Message
4 Reviewing and Submitting a Progress Report
Use the following steps to review and submit the progress report.
4.1 Reviewing a Progress Report
The Progress Report – Review section enables you to review all sections of the progress report before submitting to DOE. Use the following steps to review any section of the progress report.
1. Navigate to the Review page by clicking Review in the left navigation menu. PAMS will load the Progress Report – Review page, which displays a summary of the progress report’s eight sections.
2. To review a section, click View in the Views dropdown menu in the Options column.

Figure 48. Progress Report – Review, View
3. The section will load as a read-only page in a popup window on top of the main window. Click the X in the top right corner of the popup to close the window when you are finished.
4. If you would like to return to a previous section and make updates, click the section’s link in the left navigation menu. (Refer to the appropriate module above for guidance on completing each section of the progress report.)
5. When you are finished reviewing the progress report on the Progress Report – Review page, click the Continue button in the bottom right corner of the page.
4.2 Submitting a Progress Report
Use the following steps to submit the progress report to DOE.
1. Navigate to the submission page by clicking Continue on the Progress Report – Review page, or Submit in the left navigation menu.
2. PAMS will load the Progress Report – Submit page, which displays a summary of the progress report sections with their completion status. Each section should display “Complete” with a green checkmark in the status column. If a section is incomplete (marked as “In Progress” or “Not Started” with a green checkmark with a red slash), click the Update button for the section. (Refer to the appropriate module above for guidance on completing the section successfully.)
3. Click the Preview Public Progress Report PDF or Preview DOE Progress Report buttons in the bottom right corner of the page to preview the public and DOE versions of the progress report before submitting. This is your last opportunity to review the progress report before submitting it to DOE.

Figure 49. Progress Report – Submit
4. PAMS will generate a preview PDF of the progress report in a popup on top of the main window. This may take a few moments. Once the PDF has generated, review it carefully. When you are finished reviewing, click the X in the top right corner of the popup to close the window.
5. If you would like to edit a section, click Update in the Options column for that section. If you are ready to submit the progress report, click Submit in the bottom right corner of the page.
| If you have the Submit to DOE privilege, PAMS will provide a Submit button at the bottom of the page. Clicking the Submit button will submit the Progress Report to DOE Office of Science, and you will no longer be able to edit the Progress Report. If you do not have the Submit to DOE privilege, PAMS will provide a Submit for Countersignature button. Clicking the Submit for Countersignature button will submit the Progress Report to your Institution's countersigner(s), and you will no longer be able to edit the Progress Report. |
6. PAMS will redirect you to the Progress Report – List page and display a Success message confirming that the progress report was submitted successfully.

Figure 50. Progress Report – List, Success Message